
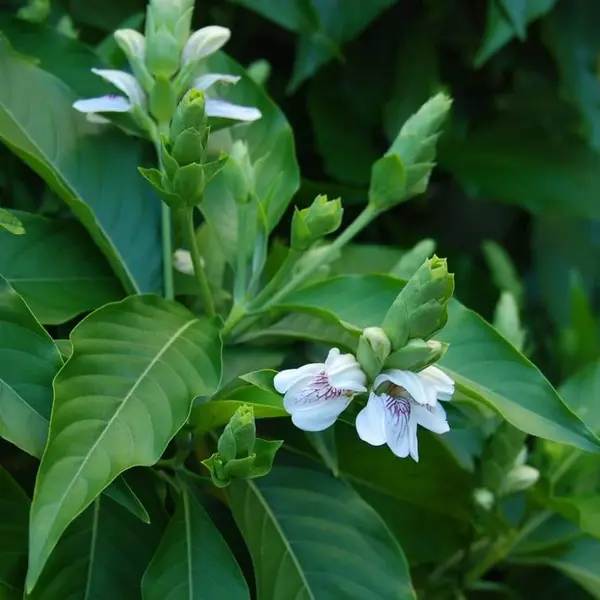


Adalodakam,Justicia Adhatoda,Adhatoda vasica
₹1.00
Out of stock
Email when stock available
Selling Size : Single Plant | Secure packing
Adalodakam, also known as Malabar Nut or Vasaka (scientific name: Justicia adhatoda or Adhatoda vasica), is a well-known medicinal plant, especially in Ayurveda, valued for its properties in treating respiratory issues.
Here’s a comprehensive guide care for an Adalodakam plant, here’s a guide:
1. Climate and Soil:
- Climate: Adalodakam thrives in tropical and subtropical climates. It can tolerate temperatures between 12-32°C but prefers 20-27°C. It is tolerant to light shade but susceptible to waterlogging.
- Soil: It prefers well-drained, loamy soil with a slightly acidic to neutral pH (6.5 – 7.5). A mix of garden soil, sand, and compost (1:1:1 ratio) works well. Good drainage is crucial to prevent root rot.
2. Propagation:
- Stem Cuttings (most common and effective): This is the most preferred method due to poor seed set and germination.
- Take tender stem cuttings 15-20 cm long with 3-4 nodes.
- It’s best to root the cuttings in a nursery (polybags filled with the recommended soil mix) before transplanting them to the main field. This can be done in March-April. Cuttings usually root readily and are ready for transplanting in about two months.
- Some studies suggest that using rooting hormones like Indole-3-butyric acid (IBA) can improve rooting success.
- Seeds: While possible, seed germination is often limited. Seeds can germinate at around 16°C, particularly in spring and the rainy season.
3. Planting:
- Field Preparation: Plough and level the main field thoroughly.
- Planting Method: Rooted cuttings can be planted on mounds or ridges.
- Prepare ridges or mounds about 60 cm apart.
- With the onset of rainfall, plant the rooted cuttings on the ridges with a plant-to-plant spacing of 30 cm.
- If planting on mounds, you can place up to 5 cuttings on a single mound.
- In sloppy areas, cuttings can be planted directly by making pits with a sharp pole.
- Waterlogging: Ensure adequate care to prevent waterlogging, as this can lead to rotting.
4. Watering:
- Water the plant when the soil is almost completely dry.
- Irrigate the crops at intervals of about 4 days, especially during drought conditions.
5. Fertilization:
- Apply organic manure such as farmyard manure (FYM), compost, or green leaf at a rate of 10 tonnes per hectare as a basal dressing.
- Apply N:P:K (Nitrogen, Phosphorus, Potassium) each at a rate of 50 kg/ha.
- Give the entire phosphorus basally (at the time of planting).
- Nitrogen and potassium can be given in two equal split doses.
6. Pruning:
- Regular pruning helps maintain the plant’s shape and encourages bushier growth.
- Remove any dead or damaged branches.
- Trim back overgrown areas.
- Pruning is best done during the growing season.
7. Pests and Diseases:
- Adalodakam is generally hardy and no serious pests and diseases are commonly reported. Its leaves are also known to act as a bio-pesticide.
8. Harvesting:
- Leaves: Leaves can be harvested from the first year of planting, typically at intervals of 3-4 months.
- Roots: Roots are ready for harvest only after two years of planting. December-January is often the ideal time for harvesting roots.
- When harvesting roots, the entire plant is usually harvested, and the roots are carefully dug out without damage.
- Harvested roots should be cleaned and can be marketed fresh or after drying.
- The total yield of root, stem, and leaves from one hectare can be 10-11 tonnes.
By following these care guidelines, you can successfully grow Adalodakam and utilize its beneficial properties.
You must be logged in to post a review.
Related products
-
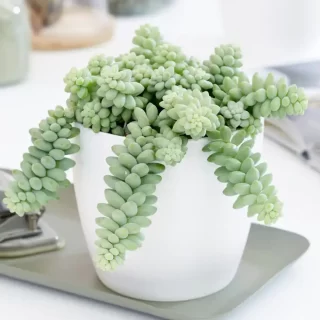
Sedum Morganianum ‘Burro’s Tail’
Original price was: ₹220.00.₹149.00Current price is: ₹149.00.Add to cartSelling size: Well rooted plant in a Jiffy bag Caring for a Sedum morganianum, commonly known as Burro’s Tail or Donkey’s Tail, involves understanding its succulent nature. Here’s a breakdown of Sedum Morganianum ‘Burro’s Tail’ key care tips: Light: Burro’s Tail thrives in bright, indirect sunlight. It can tolerate some direct morning sun, …
-
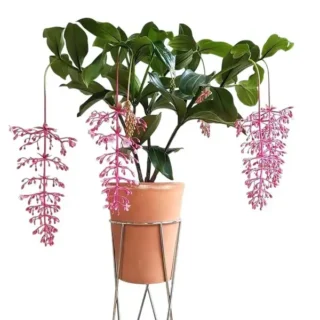
Medinilla Myriantha
Price range: ₹99.00 through ₹749.00Select options This product has multiple variants. The options may be chosen on the product pageSelling size: Single Plant | Pot Size: 2.5″-4″ (Please choose) Medinilla Myriantha – Care Origin – Philippine Islands. Genus originates in tropical Africa, SE Asia and the Pacific Islands. A tropical plant with long pink hanging flower sprays with canopies of large leaves. Common name – Rose Grape. Light These plants require bright light but …
-
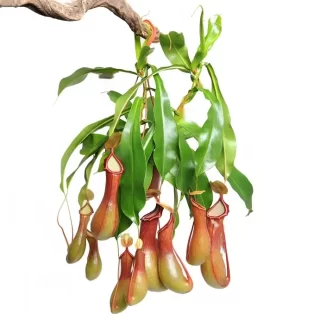
Pitcher Plant – Nepenthes Ventrata – Rare Plant
Price range: ₹449.00 through ₹849.00Select options This product has multiple variants. The options may be chosen on the product pageSelling size: Please choose | Pot Included Pitcher Plant – Nepenthes Ventrata is one interesting plant that attracts humans and insects alike. A truly unique and variable plant, it is perhaps not the best option for a novice grower – although it is said to be one of the easiest pitcher plants to grow. Therefore it …
-
Braided Pachira , Money Tree Plant, Guiana Chestnut
Original price was: ₹1,349.00.₹849.00Current price is: ₹849.00.Read moreSize: 3 Braided Plants | Pot Included | Free shipping Live Pachira plant along with the Colored plastic pot. plants height with pot is 2.5 feet and pot size is 6 inches in diameter. plants nature is indoor-semi shade, watering once in 2 days Useful for a gift, table top plant, lucky plants. Best foliage …
Braided Pachira , Money Tree Plant, Guiana ChestnutRead More
-
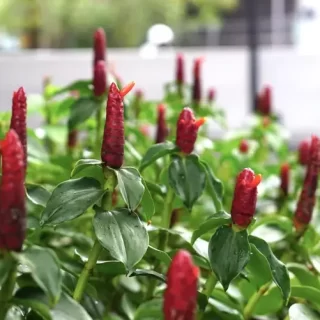
Red Button Ginger, Costus plant
Original price was: ₹890.00.₹499.00Current price is: ₹499.00.Add to cartSize: Multiple shoots Care Architectural in its form, with it’s many upright branches and formal shape. It flowers prolifically with many spikes of red wax like flowers. Loves full sun or part shade, its great for mass planting to cover large areas. Growing 50 to 70cm, it requires little maintenance. Landscaping: Ornamental Flowers Landscape Uses: Parks …
-
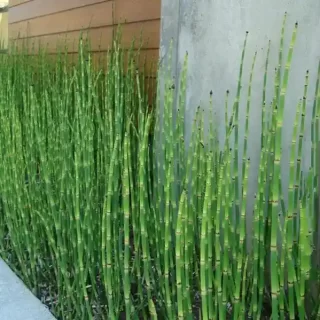
Water Bamboo, Equisetum – Plant (Water Bamboo)
Original price was: ₹950.00.₹399.00Current price is: ₹399.00.Read moreSelling size: Well rooted plant | 3 inch pot Included | Secure Packing Here’s a complete care guide for Water Bamboo (Equisetum spp.), also known as Horsetail or Water Bamboo Plant — a unique, reed-like plant that thrives in wet and semi-aquatic environments 🌿 Here’s a complete care guide for Water Bamboo : 🌿 Plant …
-
Adelonema Yanamonoensis (Big Plant) – Rare Plants
Original price was: ₹2,399.00.₹849.00Current price is: ₹849.00.Add to cartSingle Plant | Pot Included | Free Shipping Adelonema Yanamonoensis, a species that is native to Southern America. It has matt green leaves with white mid rib and veins, and the inflorescence is pink. DIFFICULTY: Easy – low maintenance LIGHT: The darker green varieties can grow in near shade, while the variegated varieties require brighter …
-
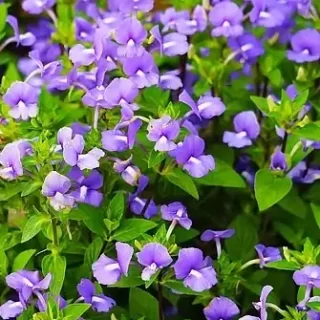
Brazilian Snapdragon
Original price was: ₹589.00.₹349.00Current price is: ₹349.00.Add to cartSelling size: Single Plant | 2.5″ Pot Included | Secure Packing The Brazilian snapdragon (Otacanthus caeruleus), also known as Amazon Blue, is a tropical perennial with vibrant, snapdragon-like blue flowers. While it’s a perennial in warm climates (USDA zones 9-11), it is often grown as an annual in cooler regions. It’s a relatively easy plant to …


 If you need any assistance, I'm always here. Have you found what you were looking for?
Reviews
There are no reviews yet.